This week we focused on gluing. We started off using colored glue on wax paper and adding collage materials to the glue. The kids were encouraged to squeeze out as much glue as possible! Once dry, the design can be peeled off the wax paper and hung in the window (but that requires lots of glue). If there's not enough glue, or the glue is scattered, the whole thing can be hung in a window- The glue and wax paper are transparent, so the light shines through the glue and creates silhouettes of the collage pieces.
For the 1s group, I added more paint to the glue so that it was easier to squeeze.
While some children were busy working at the table, others were learning how to operate a glue gun! (This was just for the 3 and the 4 year olds) I set out a large cardboard box and lots of found materials to glue to the box. Glue guns are such interesting tools because the glue dries instantly. They allow you to build in a way that wouldn't be possible to do with regular glue.
I first used low temperature glue guns, but they were still a little hot, so I switched to "cold shot" glue guns that are perfect for little ones.
An instant sculpture to take home!
The 1s and 2s classes were given regular glue and paint to use on the collaborative sculpture.
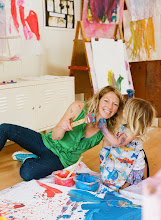
Some of the children worked on painting projects when they were finished gluing. I'm loving our new roll of white paper for painting on the floor!
It was a rainy week, but the sun peeked out occasionally and we managed to get some creative time outside!
Subscribe to:
Post Comments (Atom)


No comments:
Post a Comment