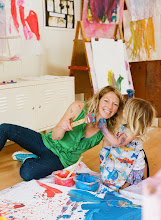
While I focused on finger painting with the new classes, the returning students began the session with Valentine printmaking. The 3s/4s class used heart shaped doilies and foam rollers to make stencil-like prints. After covering their rollers in paint, they carefully held the doilies down onto paper and rolled over them.


After rolling out the paint, the children peeled up the doilies to find their print! This one was done on a folded piece of paper to create a Valentines card.

The 1s class tried out monoprinting for the first time. They first rolled out paint onto an acrylic box, then used a Q-tip to draw a design into the paint.


Once the design was drawn I showed the children how to press a piece of paper (folded in half to make a card) down onto the design.

When they peeled it up, they found a print!

After experimenting with the printmaking the 3s/4s group began to embellish their valentines with glitter, markers, glue and collage items.

We also explored cutting out hearts by folding paper in half and drawing a half-heart along the edge (I first did this step so they could understand the concept and practice their cutting skills, then I offered them plain paper to try it out themselves).


After working on monoprints, the 1s class worked on bubble wrap printmaking and painting at the easels.


After a while this group was eager to get outside, so I moved an easel to the yard for painting, water, and sand play!


Outside, the 3s/4s class tried out jumping prints with bubble wrap, paint rollers, and paper. Jumping on the painted bubble wrap not only makes a print, but it makes a great popping sound as well!


The feeling of paint squishing around toes... soooo worth the clean up!


 After rolling out the paint, the children peeled up the doilies to find their print! This one was done on a folded piece of paper to create a Valentines card.
 The 1s class tried out monoprinting for the first time. They first rolled out paint onto an acrylic box, then used a Q-tip to draw a design into the paint.

 Once the design was drawn I showed the children how to press a piece of paper (folded in half to make a card) down onto the design.
 When they peeled it up, they found a print!
 After experimenting with the printmaking the 3s/4s group began to embellish their valentines with glitter, markers, glue and collage items.
 We also explored cutting out hearts by folding paper in half and drawing a half-heart along the edge (I first did this step so they could understand the concept and practice their cutting skills, then I offered them plain paper to try it out themselves).


 After working on monoprints, the 1s class worked on bubble wrap printmaking and painting at the easels.
 After a while this group was eager to get outside, so I moved an easel to the yard for painting, water, and sand play!

 Outside, the 3s/4s class tried out jumping prints with bubble wrap, paint rollers, and paper. Jumping on the painted bubble wrap not only makes a print, but it makes a great popping sound as well!
 The feeling of paint squishing around toes... soooo worth the clean up!


 Posts
Posts


