
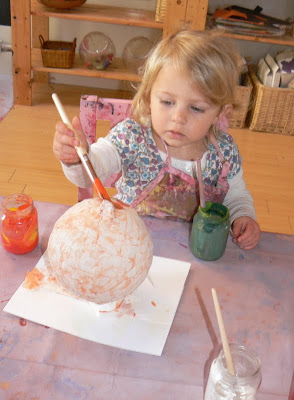
We began this week finishing up our paper mache pumpkins. I offered the children orange, red, yellow, green and white paint. We looked at a real pumpkin and talked about the colors, but I encouraged the kids to paint their pumpkins any way they liked... which of course meant adding plenty of glitter!


A few more of the finished pumpkins after I sealed them with Modge Podge.

This week we also worked on a variety of monoprints. We started by rolling paint onto acrylic boxes to cover the surface.


Then I offered each child a cotton swab to draw a design into their paint.

When the design was ready, the children pressed a piece of paper onto the box (we began with folded pieces of paper to use as Halloween cards).

Finally the children peeled up the paper to discover their print!


Next we experimented with bubble wrap monoprinting. The children rolled their paint onto the bubble wrap and then pressed paper onto it in the same way as the previous printing project. We talked about how the orange circles looked liked little pumpkins!


To continue the printmaking theme, the kids used the acrylic easel and whiteboard to make even larger prints. They covered the boards with orange paint and said that they were making a pumpkin patch! Then they drew pumpkins into the paint and used paper to make a print.


Some of the other classes expanded on our ball rolling project from last week, this time using marbles.


After a bit of rolling the marbles around, the children decided to add water. This led them to scoop, stir, and pour the marbles- so exciting!
 .
.


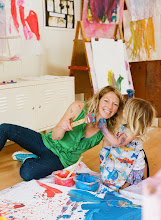
After all this talk about Halloween, the kids began waving their painted hands around saying, "spooky!"


 We began this week finishing up our paper mache pumpkins. I offered the children orange, red, yellow, green and white paint. We looked at a real pumpkin and talked about the colors, but I encouraged the kids to paint their pumpkins any way they liked... which of course meant adding plenty of glitter!


 A few more of the finished pumpkins after I sealed them with Modge Podge.
 This week we also worked on a variety of monoprints. We started by rolling paint onto acrylic boxes to cover the surface.

 Then I offered each child a cotton swab to draw a design into their paint.
 When the design was ready, the children pressed a piece of paper onto the box (we began with folded pieces of paper to use as Halloween cards).
 Finally the children peeled up the paper to discover their print!

 Next we experimented with bubble wrap monoprinting. The children rolled their paint onto the bubble wrap and then pressed paper onto it in the same way as the previous printing project. We talked about how the orange circles looked liked little pumpkins!

 To continue the printmaking theme, the kids used the acrylic easel and whiteboard to make even larger prints. They covered the boards with orange paint and said that they were making a pumpkin patch! Then they drew pumpkins into the paint and used paper to make a print.

 Some of the other classes expanded on our ball rolling project from last week, this time using marbles.
 After a bit of rolling the marbles around, the children decided to add water. This led them to scoop, stir, and pour the marbles- so exciting!
 .
.


 After all this talk about Halloween, the kids began waving their painted hands around saying, "spooky!"


No comments:
Post a Comment