
For the second week of the session, I decided to try a new form of collage with the 2, 3s, and 4s... hammer collage! First, I needed to find hammers that were small enough for toddlers, but still strong enough to drive a nail into foam. I searched three hardware stores and was unsuccessful. As I was leaving the third store, I began to eye the PVC pipe section, wondering if there was any way to use a plastic pipe as a hammer. The owner of the store, who was helping me in my search, saw my curious look and said, "How about this?!" He took a small PVC pipe, another one in the shape of a T, some rubber plugs and an end cap and began to assemble the perfect toddler hammer!

For the base of the collage, I glued together a few foam pieces to make it thick enough for the nail. We began by practicing our hammering skills with golf tees, to make sure everyone could safely drive a nail.


Once I was confident in the children's hammering skills, I offered them a small cup of nails (with large heads and fairly blunt ends) and an assortment of collage materials. They put the items onto the foam and created a design by hammering them in place.


It was great to see kids helping each other when they had a hard time holding the nail in place.

With a new found love of scissors, many kids decided to cut their own materials for the collage. Then, when one child realized that she couldn't nail a tube-shaped cardboard to her foam, she asked for tape. This lead the other kids to create tape collages with colored masking tape.


As the children began to finish their collages, I offered them paper and markers for "challenge" drawings, like the ones we painted
last week. Just as I had predicted, the markers worked better than the paint to prompt circle drawings.


In the 1s class we worked on collages, but instead of using hammers we used clear contact paper. The children chose their collage items and placed them onto the sticky side of the contact paper.

We had some older siblings join us who were very helpful!


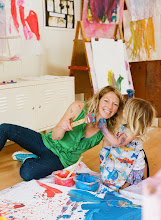
After working on sticky collages, I offered the children large finger paint paper, a plate of paint, rollers and a variety of tools from the shelf.


With most of the 1s class absent last week, I decided to bring back the watery squeeze paints. This time, I put a long absorbent paper on the ground and demonstrated "action painting," which is what Jackson Pollock was known for. The paint was flying all over, mostly landing on the paper, but also making some pretty puddles on the floor!


When the paint was all squeezed out, the kids found some brushes on the shelf and used them to move the paint around the paper.

The bucket of soapy water offered a fun, easy clean-up!

Our collaborative action painting:

Contact paper collage, hung in the window:


 For the second week of the session, I decided to try a new form of collage with the 2, 3s, and 4s... hammer collage! First, I needed to find hammers that were small enough for toddlers, but still strong enough to drive a nail into foam. I searched three hardware stores and was unsuccessful. As I was leaving the third store, I began to eye the PVC pipe section, wondering if there was any way to use a plastic pipe as a hammer. The owner of the store, who was helping me in my search, saw my curious look and said, "How about this?!" He took a small PVC pipe, another one in the shape of a T, some rubber plugs and an end cap and began to assemble the perfect toddler hammer!
 For the base of the collage, I glued together a few foam pieces to make it thick enough for the nail. We began by practicing our hammering skills with golf tees, to make sure everyone could safely drive a nail.
 Once I was confident in the children's hammering skills, I offered them a small cup of nails (with large heads and fairly blunt ends) and an assortment of collage materials. They put the items onto the foam and created a design by hammering them in place.


 It was great to see kids helping each other when they had a hard time holding the nail in place.
 With a new found love of scissors, many kids decided to cut their own materials for the collage. Then, when one child realized that she couldn't nail a tube-shaped cardboard to her foam, she asked for tape. This lead the other kids to create tape collages with colored masking tape.
 As the children began to finish their collages, I offered them paper and markers for "challenge" drawings, like the ones we painted last week. Just as I had predicted, the markers worked better than the paint to prompt circle drawings.


 In the 1s class we worked on collages, but instead of using hammers we used clear contact paper. The children chose their collage items and placed them onto the sticky side of the contact paper.
 We had some older siblings join us who were very helpful!
 After working on sticky collages, I offered the children large finger paint paper, a plate of paint, rollers and a variety of tools from the shelf.
 With most of the 1s class absent last week, I decided to bring back the watery squeeze paints. This time, I put a long absorbent paper on the ground and demonstrated "action painting," which is what Jackson Pollock was known for. The paint was flying all over, mostly landing on the paper, but also making some pretty puddles on the floor!
 When the paint was all squeezed out, the kids found some brushes on the shelf and used them to move the paint around the paper.
 The bucket of soapy water offered a fun, easy clean-up!
 Our collaborative action painting:
 Contact paper collage, hung in the window:


 Posts
Posts


