
 It's a new session with very experienced, returning students! For the 2s, 3s and 4s, I was confident that they were ready to pump their own paint for our color mixing project so I set up a color bar. Each child was given a few cups and brushes to create their own colors. They brought one cup up at a time and pumped out their choice of the primary colors (red, blue, and yellow) then added white to make lighter tints (I used old gallons of paint and mixed in plenty of water so the kids could pump out as much as they pleased. I knew that the pumping would probably be more exciting than the painting, so using watered down paint was a good way to cut down on the waste!)
 When they returned to their seats, they stirred and painted to check out the colors they had made.
 For the 1s class, I offered them squeeze bottles with watered down tempera instead of pumping it straight from the gallon.
 Once they mixed their paints, I offered them tissue paper shapes to use in their paintings. Sometimes we found that they had mixed a color that exactly matched a tissue shape.


 The children began to collect new tools from the shelf to use with their paintings (mostly cars, combs, and whisks).


 As the children moved around to work at the easels, I switched out their finished paintings with new paper that had circles and squares cut out of it. This was partly to continue the shape theme from the tissue paper, but also to see if the cut out shapes inspired them to paint differently. I got this idea from the Artful Parent, but she used markers which seems to make a difference- maybe next time we'll try that.
 The kids began to experiment with pouring their paint onto the paper without mixing it. This created a marble effect that they could swirl and move around the paper... this is where the messy art really began!


In one of the 2s classes, the children were obsessed with pumping the paints from the gallon jugs (even though the paint began to squirt in all directions and was splattering all over them!).
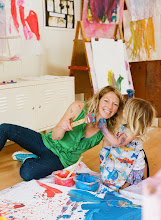
 I didn't want it to squirt in their face, so I threw a mat on the floor, moved the paint jugs down to the mat and let them go at it. This photo is a little blurry, but you get the idea! Then the kids took off their shoes and squished their toes in the colorful puddle. It was too slippery to keep it going for long, but it was fun while it lasted!
 I wanted to offer a similar experience for the 1s class without the slip factor, so I set up a paint puddle station on the water table outside. We also experimented with making prints of our swirly colors.
 Towards the end of class, the 2s groups requested scissors to practice cutting. This was a nice calm ending to a super fun, super messy day.



 Posts
Posts


