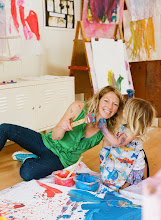
This week the newer 2s class explored colored glue and collage bits. I offered the children their clay work from last week as well as a large piece of tag board to use as a base. Although the collage materials are intriguing, the act of squeezing glue is always the best part! And when you add color to the glue... even better!
The children remained focused for a while on their collages- sometimes moving to the easels for a break and then returning to the table to continue their work.
Towards the end of class, I brought out trays, paint, and marbles to expand on the ball paintings (golf and large balls) from last week. After doing this project in other classes, I noticed that the children really enjoy the difference of having lots of small balls rather than one or two large balls. Or maybe it's the clanking noise that the glass marbles make! Scooping and pouring the marbles is also very exciting!
So much orange- just in time for Halloween!
Wednesday, October 27, 2010
Monday, October 25, 2010
Halloween Monoprints and More!
We began this week finishing up our paper mache pumpkins. I offered the children orange, red, yellow, green and white paint. We looked at a real pumpkin and talked about the colors, but I encouraged the kids to paint their pumpkins any way they liked... which of course meant adding plenty of glitter!
A few more of the finished pumpkins after I sealed them with Modge Podge.
This week we also worked on a variety of monoprints. We started by rolling paint onto acrylic boxes to cover the surface.
Then I offered each child a cotton swab to draw a design into their paint.
When the design was ready, the children pressed a piece of paper onto the box (we began with folded pieces of paper to use as Halloween cards).
Finally the children peeled up the paper to discover their print!
Next we experimented with bubble wrap monoprinting. The children rolled their paint onto the bubble wrap and then pressed paper onto it in the same way as the previous printing project. We talked about how the orange circles looked liked little pumpkins!
To continue the printmaking theme, the kids used the acrylic easel and whiteboard to make even larger prints. They covered the boards with orange paint and said that they were making a pumpkin patch! Then they drew pumpkins into the paint and used paper to make a print.
Some of the other classes expanded on our ball rolling project from last week, this time using marbles.
After a bit of rolling the marbles around, the children decided to add water. This led them to scoop, stir, and pour the marbles- so exciting!
.
After all this talk about Halloween, the kids began waving their painted hands around saying, "spooky!"
A few more of the finished pumpkins after I sealed them with Modge Podge.
This week we also worked on a variety of monoprints. We started by rolling paint onto acrylic boxes to cover the surface.
Then I offered each child a cotton swab to draw a design into their paint.
When the design was ready, the children pressed a piece of paper onto the box (we began with folded pieces of paper to use as Halloween cards).
Finally the children peeled up the paper to discover their print!
Next we experimented with bubble wrap monoprinting. The children rolled their paint onto the bubble wrap and then pressed paper onto it in the same way as the previous printing project. We talked about how the orange circles looked liked little pumpkins!
To continue the printmaking theme, the kids used the acrylic easel and whiteboard to make even larger prints. They covered the boards with orange paint and said that they were making a pumpkin patch! Then they drew pumpkins into the paint and used paper to make a print.
Some of the other classes expanded on our ball rolling project from last week, this time using marbles.
After a bit of rolling the marbles around, the children decided to add water. This led them to scoop, stir, and pour the marbles- so exciting!
.
After all this talk about Halloween, the kids began waving their painted hands around saying, "spooky!"
Posted by
Megan
at
2:41 PM
0
comments
Labels:
Children's Art,
Holiday,
Printmaking,
Sculpture,
Tempera Paint
Wednesday, October 20, 2010
Clay and Halloween Ball Paintings
This week the new 2s class and the 1s class both experimented with clay. Each child was first given a slab of moist red clay and a few simple tools (a rolling pin and a pizza cutter). After the initial introduction, I began to slowly bring out a variety of new modeling tools and familiar items to use with the clay. The children cut, poked, and squished their clay, enjoying the cool sensory experience on these hot days.
When the children began moving to the easels to paint, I encouraged them to bring the paints back to the table to use on their clay. The unexpected mix of paint and wet clay was exciting! The kids then began going to the shelf to choose new materials to work with as well (such as sticks, necklaces, and glitter).
The 1s class especially enjoyed squeezing water onto their clay.
After working with the clay for a while, I brought out a new golf ball painting project for the 2s class. In the spirit of Halloween, I gave them black paper and orange paint to use with their golf ball and tray. They then shook the tray around to create interesting lines on the paper.
This soon turned into mixing and scooping the balls and using them with the other materials.
For the 1s class, I placed a bucket of warm soapy water in the corner of the room in case they needed to wash the clay off of their hands before going outside. This was much more exciting than I had anticipated! They hung out here for a while, dumping items into the water, giggling, and using wet chalk to draw on the chalk wall.
At the end of both classes, we moved outside and experimented with a larger version of the golf ball painting... another Halloween inspired piece!
But of course pouring water is the most fun of all!
Subscribe to:
Posts (Atom)